Feeding my Creative Soul: The Art of Nick Bantock

When I was 13 years old, my mom gave me a treasure of a book. It was the story of an "extraordinary correspondence" between an artist and the woman who sees his art develop as he makes it. The truly compelling part was that the book was made up of postcards and letters sent by each character, with stunning original artwork, and real letters that you could pull out of real envelopes. I was completely entranced. Not only did the story light up the part of me that loves a good, dark mystery, but the artwork was like nothing I had ever seen before. The book was Griffin and Sabine and the author/artist - Nick Bantock - went on to become one of my greatest artistic influences. Nick Bantock - Griffin and Sabine    nick bantock griffin and sabine    

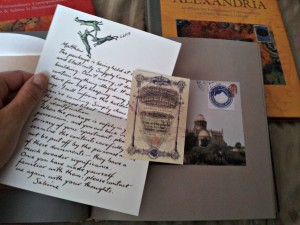
In the first book we learn that Sabine lives on an (imaginary) island in the South Pacific, and that she has taken over her father's work of cataloging all the islands plants and animals. She is an artist as well and designs stamps for her small country. As I reread the book recently I saw all my aesthetic fascinations come to life: natural history, maps, stamps and mail art, mythology, collage, and postcards. I don't know if these obsessions were initially inspired by my experience of Bantock's work, but it certainly breathed life into them.

Nick Bantock - Forgetting Room Collage
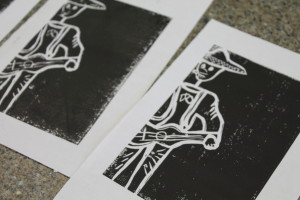
Another favourite Bantock book is The Forgetting Room, the story of a man who returns to his family's home in Spain to settle his grandfather's estate. There he finds a puzzle to unravel and in the process learns to create art as his grandfather did. Again the mystery pulled me in, however to me the most important part of the book is when the narrator explains how he makes a collage, guided by remembered words of his grandfather. Each step of the process is shown in the book and this felt like a magical glimpse into the secret world of an artist I admired so much. Here he was, laying out step by step how he makes his enigmatic images. I couldn't believe I had been given such a gift, and immediately began experimenting with this technique in my own collages. I was able to create work that was so much more rich and satisfying than it had been before.

"Chaos, order, chaos, order recurring. The layering of texture, the building from ground was like archaeology in reverse--onion-like skins plumping themselves out, one by one. I worked fast, playing with the materials to see what would happen. When the picture started to work in some sections, it became more difficult and the changes I made were less radical, though I still wouldn't allow myself to become precious."

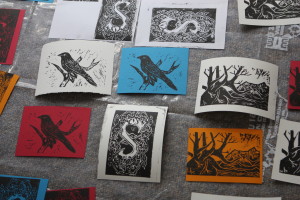
Bantock's art is forever fascinating to me because of the layers and textures. You can dive into one of his collages and explore it like it's its own little world. I love the darkness, the mischievousness, the feeling of something so very very old, with infinite stories to tell. His writing, too, evokes far away lands and ancient tales, and sets my imagination aflame.

nick bantock collage

nick bantock collage

Opening up these books again has felt like taking a deep breath of my own creative history. I remember why I wanted to make art. I wanted to inspire people the way I had been inspired. I wanted to explore ancient stories and feelings, to plumb the richness of my experience and dive down deep. I wanted to be like an archaeologist, an explorer, a natural historian, documenting the treasures I uncover. Thank you Nick Bantock for reminding me of why I do what I do.

Is there anything from your past that still inspires you today? I'd love to hear about it in the comments below.

Have a look at Bantock's website for more images and info. Or just do a Google image search and prepare to be blown away.

How to Shop Like an Artist - Thrift Shopping Tips

thrift shopping  

I seriously love thrift shopping. My parents used to take me as a kid because we didn't have a lot of money but I had no idea that was the reason - I thought they were taking me on a fun adventure. I always had the weirdest clothes at school - but I also got the most compliments on how I dressed. I still buy 80% of my clothes second-hand. Partly because I work part-time and am trying to start my own business (read: I'm broke), but mostly because it still feels like an adventure.

Having done this for a couple decades now, I've learned a thing or to about how to do it well. By which I mean, how to choose the right things and not end up with a pile of crap that I'll never wear. I save money and dress just as well as people who buy all their clothes new. One of my greatest fashion achievements was when I was working in an office where everyone tried to look their best. Part of my job description involved being "put together from head to toe." One of the youngest, hippest staff members told me one day that I always dress really well. I told him that I buy most of my clothes secondhand and his draw dropped. That's right, just because you wear used clothing doesn't mean you have to look secondhand.

In fact, I've found that secondhand clothes often hold up better than new clothes. I bought a blouse at Anthropologie (a rare occurrence for me, and yes it was from the clearance rack) and after one wash it didn't sit right. Usually the clothes I bring home from Goodwill will last for years because they've already proven the the test of time - they held together long enough to be worn and given away.

If you want to give thrift shopping a try and aren't sure where to start, here are some of my fool-proof tips for getting the most out of a secondhand shopping spree:

1. Sneak up on the store. I find that the more I plan a trip in advance, the less likely I am to find something. It's like they see me coming. Those days when I quickly drop in between errands are when I find some of my best pieces. Try not to get too attached to the outcome. Sometimes you find amazing things, sometimes you don't - that's what makes it an adventure.

2. Choose the right store. Some secondhand stores are getting more and more expensive. If the quality of the clothes was improving that wouldn't be a big deal. But I often find a better selection at some of the cheaper stores and I would rather spend $6 than $15 on a secondhand skirt. It might take some exploring to figure out which stores consistently have a good selection. Here in Edmonton I've found the south side Goodwill rarely lets me down.

3. Don't get discouraged. Creativity thrives with constraints (don't believe me? check out this Ted Talk) and when shopping through other people's rejects, you're nothing if not constrained. I can't go into a Goodwill and come out with the latest trend by the latest designer. Instead, I might go with a colour palette in mind (jewel tones, or earthy colours, or vibrant spring colours), or a feeling (sentimental, edgy, delicate) and grab anything that catches my eye. Sometimes I look through fashion magazines or blogs to get ideas before I go, and sometimes I just think about what my closet is missing. Then I put myself at the mercy of the fashion gods and hope for the best.

4. Go with a purpose. Giant stores can be overwhelming, so if I don't have a lot of time I will limit myself to certain sections. If I need a blouse for work, or a cardigan, I will stick to those sections and leave the rest. It helps me focus when flipping through racks and racks of random items. I also try to set a budget to make sure I only buy what I really love.

5. Don't buy something unless it's in perfect condition. Watch for armpit or food stains, rips and tears (these can be sneaky and hard to spot), missing buttons, pilling, etc. Just because it's cheap doesn't mean it should be poor quality.

6. Don't buy anything that doesn't fit. Perfectly. Always try everything on and put back anything that doesn't look amazing. If you're like me, you won't alter it, it will just sit crumpled in a heap until you throw it out. Something that costs $6 is often not worth the effort of fixing.

7. Play the 'will I wear this?' game and be real with yourself. That's not to say you have to put back every amazing find that you have no immediate use for. I recently bought a purple corset-style top that I know I'll wear someday. Past finds include a 50's style dress that was my go-to costume for years, and a tweed cloak that turned into a fantastic Sherlock Holmes costume. But let these be the exceptions rather than the rule. Even $5 indulgences start to add up so be a little ruthless with yourself. On my last trip I let go of a beautiful skirt that fit me perfectly because I knew I would have a hard time figuring out what to pair it with and it would hang in my closet making sad eyes at me for years.

8. Wash everything before you wear it. This probably goes without saying, but you don't know where the clothes have been before you bought them and they usually have that musty thrift store smell that really won't add anything to your outfit.

Most importantly, have fun! Enjoy the thrill of the hunt - and the savings! Do you have any tried-and-true thrift shopping secrets? Leave a comment below!


Learning DSLR Photography: Chocolate

I'm stepping out of my comfort zone again to show you another experiment with DSLR photography. I interviewed a local chocolatier (the blog post will be published here soon) and she gave me a box of chocolates to try. More beautiful than most, these chocolates lend themselves to photography thanks to their vibrant colours and unique shapes and textures. They taste pretty good too! Here's the story of a beautiful box of chocolates told in pictures.

DSLR photography - chocolate

Even the box is beautiful. It's inviting me in...

DSLR photography - chocolate

This is the magical view you get when you open the box.

DSLR photography - chocolate

Contemplating the chocolates...

DSLR photography - chocolateDSLR photography - chocolate

I love reading the descriptions. They really make the flavours come alive.

DSLR photography - chocolateDSLR photography - chocolateDSLR photography - chocolateDSLR photography - chocolate

Time to try the first one!

DSLR photography - chocolate

That's cassis coulis (like blackcurrant jam) and white ganache (chocolate mixed with cream). Yum!

DSLR photography - chocolate

And this one is pistachio!

DSLR photography - chocolate

Just one left! Yes I ate them all in one sitting.

DSLR photography - chocolate

All gone! Feeling a little sick...

What did I learn?

  • That I need more lighting than I think I do. Even with big windows I realized I could have used a lamp or two since most of these turned out too dark and I had to use editing software to brighten them up.
  • Take more pictures! Try more things! I wish I had turned the box around to get it from the other side, that I had taken the chocolates out of the cups, and that I had captured more of the insides of the chocolates. I could have photographed my messy fingers too!
  • Can I turn the camera more? Almost all the pictures are the same direction. They work, but it would have been good to try the other way too.
  • Need to be more careful about focus - I use automatic focus and sometimes I don't love where it chooses to focus. I need to pay more attention to that.

Have an idea about how I could have made these pictures better? Leave a comment! Let me know what you've learned about digital photography.


How I Face my Greatest Creative Challenge: Anxiety

spring flowers anxietyI set myself the goal of publishing a blog post every week, by Wednesday at the latest. At 2:00 last Wednesday what was I doing? Putting the finishing touches on a post? Nope. I was playing Candy Crush like my life depended on it and daydreaming about the weekend. What kept me clicking on candies instead of writing the post I had planned? Laziness? Procrastination? I think it was more likely something that I often struggle with, something that keeps me from producing my best work. Anxiety, my old friend, was back to lend me a not-so-helping hand.

When I thought about writing the post I felt my muscles tighten up and my stomach started to feel queasy. I played games as a way to avoid and escape the uncomfortable feelings. When this happens I often wonder, what am I so scared of? Nothing rational. There is no immediate danger inherent in me publishing a blog post. However, there are days when doing the dishes or even just getting out of bed seems scary. On those days trying to accomplish something creative - especially if it's meant for an audience - feels monumentally difficult. So I cut myself some slack and continued crushing candies until my eyes crossed.

Unfortunately, this anxiety is the worst thing for my ambition and my creativity. It wants me to play safe so it keeps me thinking small and it swirls worries through my mind so that I can't see what's really important to me. I tricks me into thinking that I don't want to create, or that I'm too tired, or that I don't have any ideas. Sometimes it shows up as nausea or a headache, giving me one more reason to stay put. It's very common when I'm writing, but it it also likes to rear up when I'm working on new art work. If I find I'm having to drag myself to the craft table, usually there's some unresolved anxiety holding me back. If I don't deal with it, I spend hours in bed or staring out the window feeling like I'm wasting my life. To put it mildly, it's not fun.

So what do I do about it? My mission for this year it to create habits that keep anxiety from creeping into my creative life, my relationships, and my well-being, and I'm happy to report that, despite the occasional struggle, I've been more successful than ever. There's still a long way to go, but here are 3 major things that have been helping:

spring flowers

Detailed to do lists

The more I need to think about what I'm going to do next, the more room there is for waffling, confusion, overwhelm and fear. If I write down my three biggest priorities for the day in order of importance it's easier for me to focus and dive in. I also try to start with the hardest project, the one I most want to avoid. It's much easier to overcome the anxiety early in the day when I have more energy and finishing these difficult tasks gives me such a sense of satisfaction that everything feels easier afterwards. In the case of last week's blog post my bleary afternoon mind didn't stand a chance.

“I have learned over the years that when one's mind is made up, this diminishes fear; knowing what must be done does away with fear.” Rosa Parks

Self-compassion

I use a mindfulness bell on my phone. It rings at random times throughout the day and reminds me to check in with myself. When it goes off I try to muster up compassion for myself, no matter how anxious I'm feeling. Giving myself that little bit of love throughout the day helps me take the pressure off and feel better. I've learned that trying to fight the anxiety or push it away only makes it worse, so I try to be gentle with it, to sit with it, and to feel what is it trying to tell me. Maybe I feel anxious because I'm overworked and need a break, or maybe I haven't done enough research to feel confident. Often I'm just trying to do something outside my comfort zone and so I have to be nice to myself, and super patient. If I berate myself and go on a guilt trip, it will be much harder to step outside my comfort zone again.

Plenty of exercise and sleep

I've always needed a lot of sleep. If I get less than 8 hours I have a hard time concentrating and if I want to do my best work I need at least 8.5. This is something that will differ for everyone, but it's important to figure out how much you need to be at your best. When I'm tired I have a harder time making decisions and a much harder time showing myself compassion. I get frustrated a lot more easily and the fear grabs hold a lot quicker. The same seems to be true for exercise: when I move my body through yoga, dance, cycling, walking, dragon-boating, or swimming, it gets me out of my head and stops the spinning thoughts that bring me down. The more time I spend focused on my body rather than my thoughts, the clearer I can think and the better work I do.

To read more about how I deal with anxiety in my everyday life (it's a big topic for me), check out my blog at livinglikewater.wordpress.com.

Does this ever happen to you? Do anxiety and fear hold you back from doing what you really love? I would love to hear from you. Leave a comment below to tell me about your experiences and what you do to feel better.

Maps as Inspiration and the Stories They Tell

personal mapsIf you've followed me from my I Heart Edmonton days, or have seen very much of my artwork, you'll know that I'm a teensy bit obsessed with maps. I'm inspired by them and love incorporating them in my work. What's the big deal about maps? I could write for days about all the interesting things I've learned about them (and maybe someday I will), but for now I'll just share what I think is one of their most interesting features: how we can use them to tell stories. If you've ever taken a road trip, you can identify with the map as storyteller. It shows you the ground you've covered since leaving home. A few years ago my brother and I drove all the way around the United States, touching 34 states in 2 months, and I used a map to keep track of our route. I kept it as a souvenir: the thick yellow line running in a rugged circle around the country reminds us of where we went, of the things we saw, and of the adventures we had. That yellow line is as evocative for me as a photo album.

Maps can also tell the stories of where we want to go. I'm thinking of all the times I've planned a trip - whether to a foreign continent, or to an unfamiliar part of of the city I live in - poring over the details on a map, trying to visualize a journey from one place to another and imagining how it might turn out.

Even if we spend most of our lives in one place and have no need to physically look at a map, they are still constantly helping us understand the world around us. We create mental maps of places familiar to us: of our route to work, of the aisles we regularly visit in the grocery store, of our path around the house as we get ready in the morning. Just think of how disorienting it is to walk into a grocery store in a different part of the city; on the outside it looks the same as the one we're used to, but inside things are backwards or mixed up. Our mental map tells us to go one way but reality tells us something different. These mental maps help us define how we fit into the world around us.

Mapping can be more abstract as well. We talk about mapping out our future, or making mind maps when we're trying to solve a problem. Though they refer to time or ideas rather than space, these visual representations have as much to say to us as the maps created by our footsteps. To create a map of the future, we have to explore the map of the past, examining what worked and what didn't and using that as a jumping off point to get somewhere new. When we explore the contents of our mind, we are sometimes surprised to discover uncharted territory. Either way we learn something new about our character and our stories.

Our bodies, too, form maps as we seek to understand and cure injuries or illnesses. I recently spent 5 months seeing a physiotherapist for pain in the back of my leg. The pain moved around, traveling up and down and the physiotherapist had to explore the interactions between different parts of my body to discover the cause and to heal it. I can now trace the path between tension in my lower back and pain behind my knee. I have a map. And I have a story.

We normally associate maps with straightforward geography, looking at them as completely objective representations. But they can mean so much more if you're willing to dive in and explore a bit. I would be willing to bet that no two people would draw a map of an area in exactly the same way; everyone sees things a little differently, and everyone's interpretations would vary. Some might focus more on physical details, and some on emotional. Think about it: if you were to draw a map that told the story of you, what would it look like?

If all this talk of maps and stories has got you excited and you want to explore the topic further, I will be teaching a brand new workshop on Wednesday, October 1, 2014 from 6-8pm called Personal Map-Making in which I will guide you through the process of mapping your own story. Will you choose to focus on geography or on emotional states? On networks of relationships or of memories? Either way, everyone has a powerful tale to tell, and I hope that you'll join me to try to represent that tale with your own unique map. Find more information and register here.

4 Things You'll Learn in My Printmaking Workshop

scarab prints

What I love most about teaching this workshop is that it's not just about making linoleum block prints. That's a huge part of it, obviously, but there are a few other things that I think it's important to teach, and they're things you might not have thought of. Here are four of them:

1. How to take an idea from start to finish

Tell me if this sounds familiar: you have the best idea for a project, or something new you want to try. You go out and get all the supplies and dive in, full of enthusiasm, only to give it up halfway through without finishing. We all do this. When something gets hard, frustrating, or even just a little less exciting, we tend to give up and move on to other things. I used to do it all the time. In this workshop, however, you'll get the satisfaction of starting something, and then finishing it. You will leave knowing exactly how to overcome those frustrating challenges that might have made you give up if you were doing it on your own. And hopefully that sense of satisfaction you get from completing a project will motivate you to try and finish more.

2. How to be patient with yourself

When learning a new skill, it's easy to get fed up and decide, "I'm just not good at this. I shouldn't even bother." We've all heard about the value of having patience with ourselves, but how often do we actually practice it? In this workshop I'll provide that gentle voice that tells you to keep going, to keep trying, that it's not as bad as you think it is. I'll help you focus on what's going well and remind you to cut yourself some slack. Once you see that patience pay off, you'll be more likely to practice it in the future.

3. How to handle "mistakes"skeleton print

With this art form it's inevitable that you will make a mistake - probably a few mistakes actually. I still slip when I'm carving the linoleum and create scratches and lines that I don't want. The only way to deal with this is to try to make it part of the design, to make it look like you meant to do it. This requires a little bit of creative problem solving and I'll be there to help you make sure that your "mistakes" end up looking beautiful.

4.  That you're more creative than you think you are

Many people think that if they don't draw their design themselves that they're not being creative. They're usually surprised, then, by how unique and beautiful their prints turn out. The truth is that just by choosing something to turn into a print, you're making a creative decision. You make more creative decisions when you decide how you'll carve it, what parts you'll leave white and what parts will be black, and then how you'll print it, with more or less ink. If you've never done anything "artistic" before, and think you're just not cut out for it, I'll show you how simple it can be to make a work of art that others will marvel at. Don't believe me? All the prints featured in this post were created by past students, many of whom don't consider themselves to be particularly artistic. My favourite part of the workshop is watching students pulling the paper off and seeing their prints for the first time. The amazement and wonder on their faces makes my day.

MTW92I hope you'll join me at the next workshop on Saturday, September 27th from 1-5. There are only 5 spots available, so sign up now!

More information and registration here.

Sneak Peak: How I Make My Hearts

paper mache heart
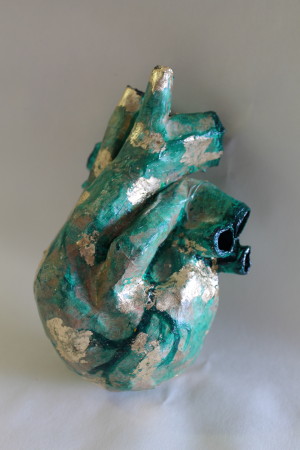
With one of my biggest shows of the year coming up in two days (it's the spring Royal Bison for all those of you local to Edmonton - check it out!) I thought I would share the process behind my new heart sculptures. I was first inspired to make these hearts when I visited the Mutter Museum in Philadelphia. This was actually one of the most interesting places my brother and I went on our two month road trip around the States and I highly recommend it. The focus of the museum is on the history of medicine and "medical oddities". Along with plenty of information, the small building is crammed with human body parts in jars and models of body parts. Definitely not for the faint of heart, you could spend hours looking at all the beautiful and grotesque items on display. And we did. My favourites were the intricate models that had been made to teach about different organs like the heart or the lungs. Not having 3-D printers, these were painstakingly made with super fine layers of paper mache and painted by hand. They were breath-taking. Something in me clicked that day and I left with a desire to turn the shapes from the human body into artwork.

That fall I made my first heart for a friend. Using 3-D images online first heart
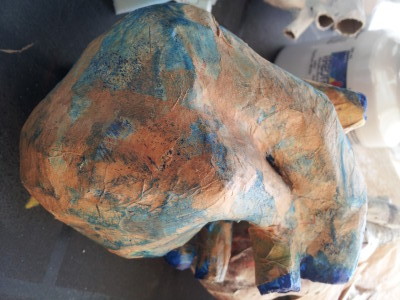
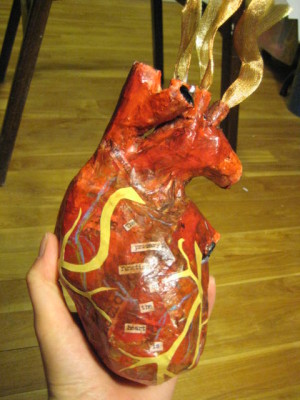
as a guide, I balled up newspaper to make the meaty part, then used toilet paper tubes to form the various passageways, holding it all together with masking tape. I covered the whole thing in paper mache, then collaged and painted it, using cut paper to form the veins. I gave it to my friend on her birthday, not sure if she would love it or think it was super weird. She loved it, and still has it 5 years later. A few years later I made one for my boyfriend on our first Valentines Day. He suggested that I make them for my I Heart Edmonton line and I was really excited about the idea. I decided to close that line of art before I got around to making the hearts but the idea stuck and now I finally have some for sale.

The main ingredients for these have stayed the same: balled-up newspaper, toilet paper tubes, and masking tape. To get the finish I collage pieces of maps alternating with beige tissue paper and paint, adding several layers to create depth. I was inspired to use the tissue paper when I looked down at my hand one day and saw the translucent skin stretching over the veins. I finish it by painting on the veins and covering it in a protective varnish.

paper mache heart  paper mache heart  paper mache heart  paper mache heart

You can purchase these hearts at the Royal Bison this weekend, and online in the near future. Sign up for email updates to find out more.

If you live in Edmonton and want to learn more about how I make my art, I will be teaching two workshops this month. Sign up on the right for details.


Learning DSLR Photography: The Orchid Show

Orchid 8
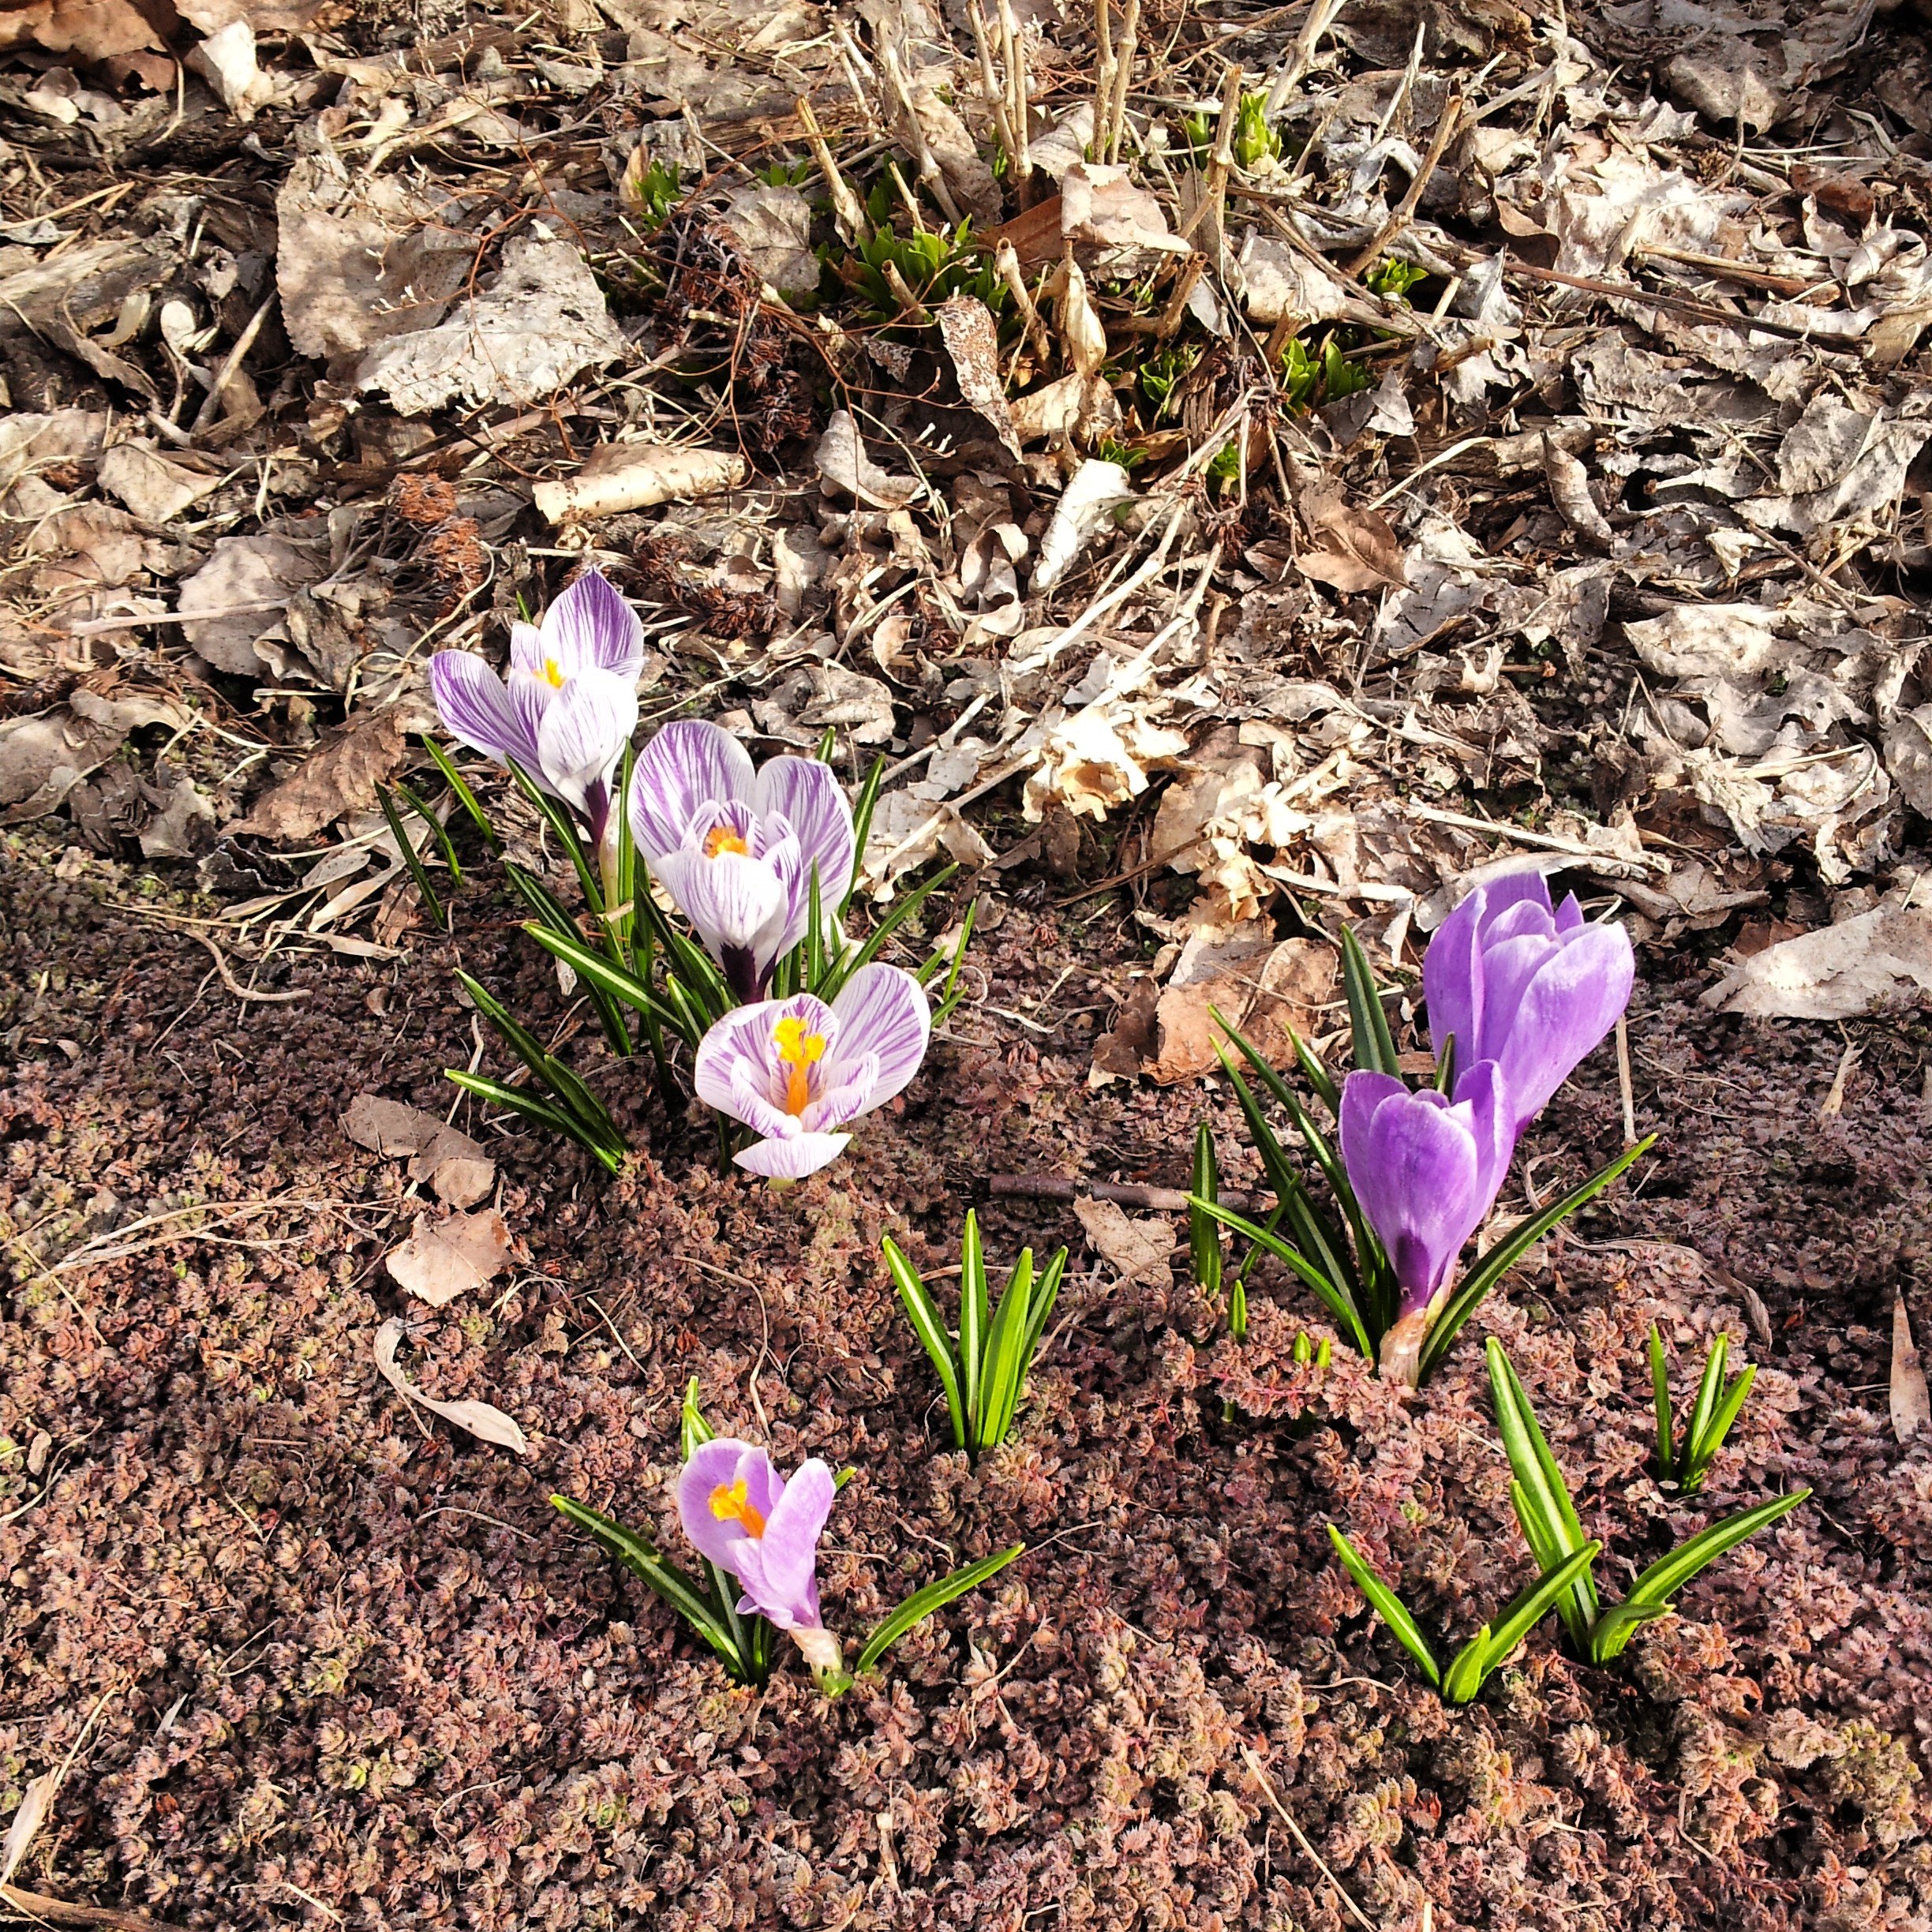
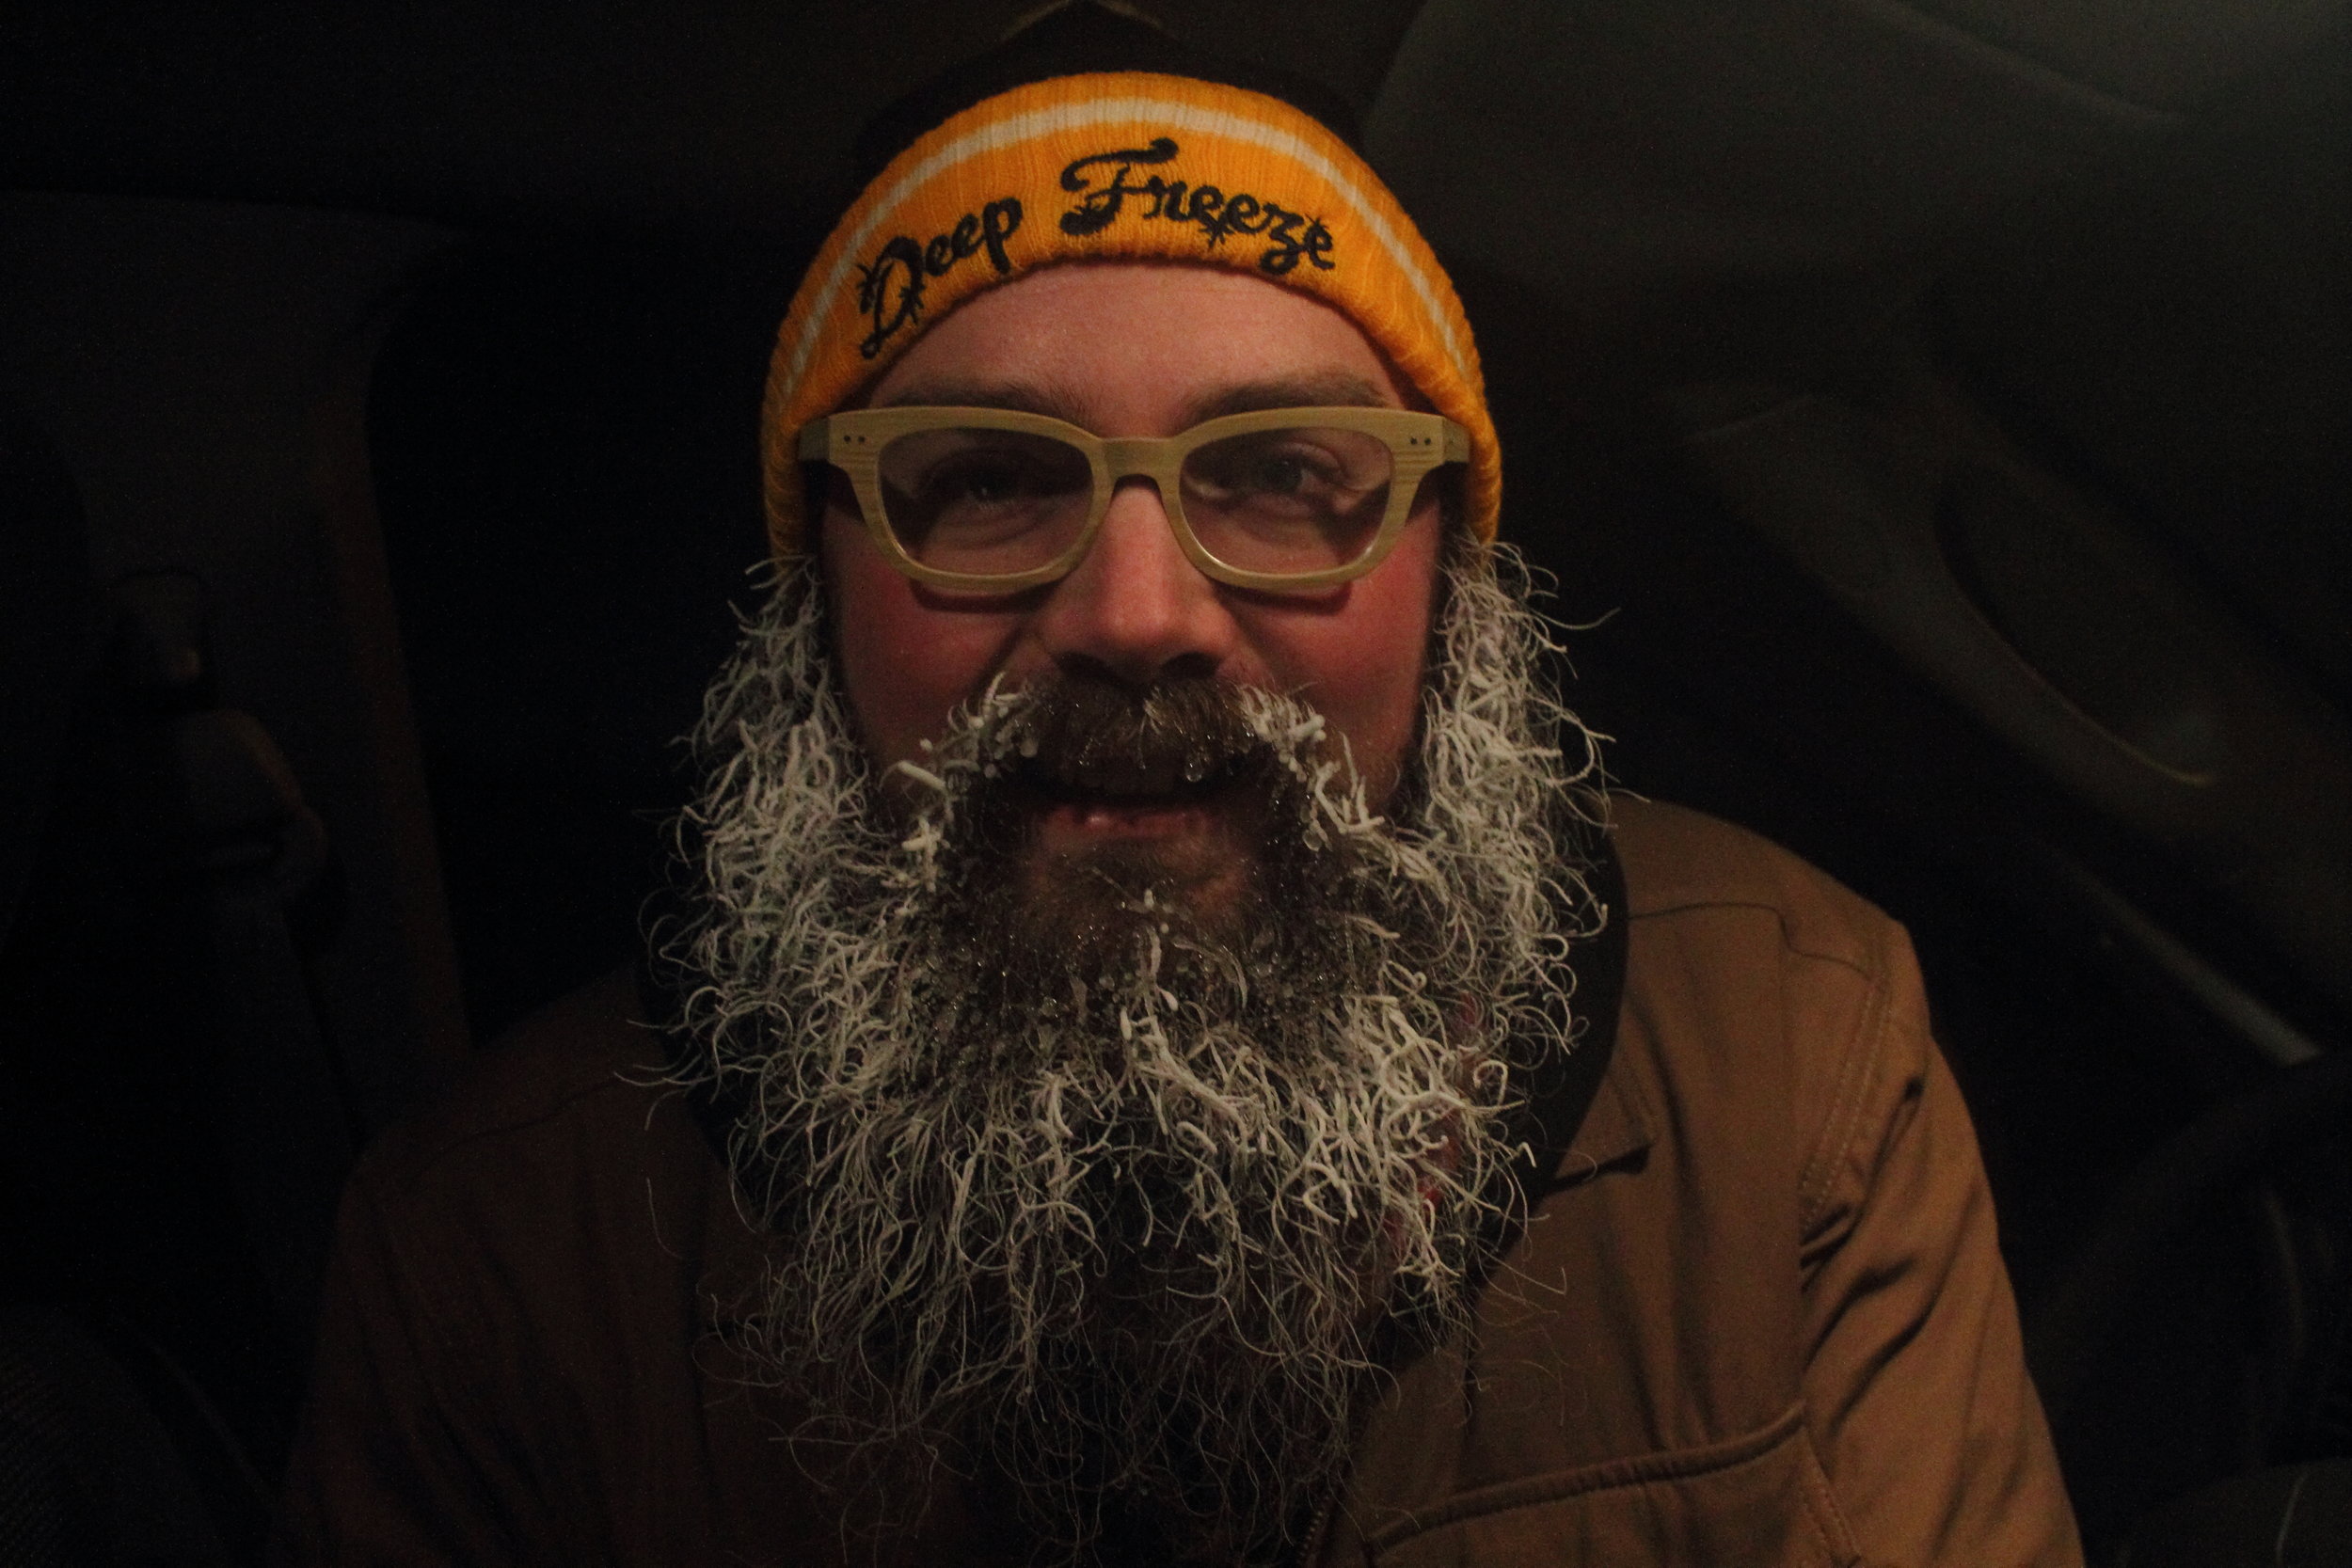
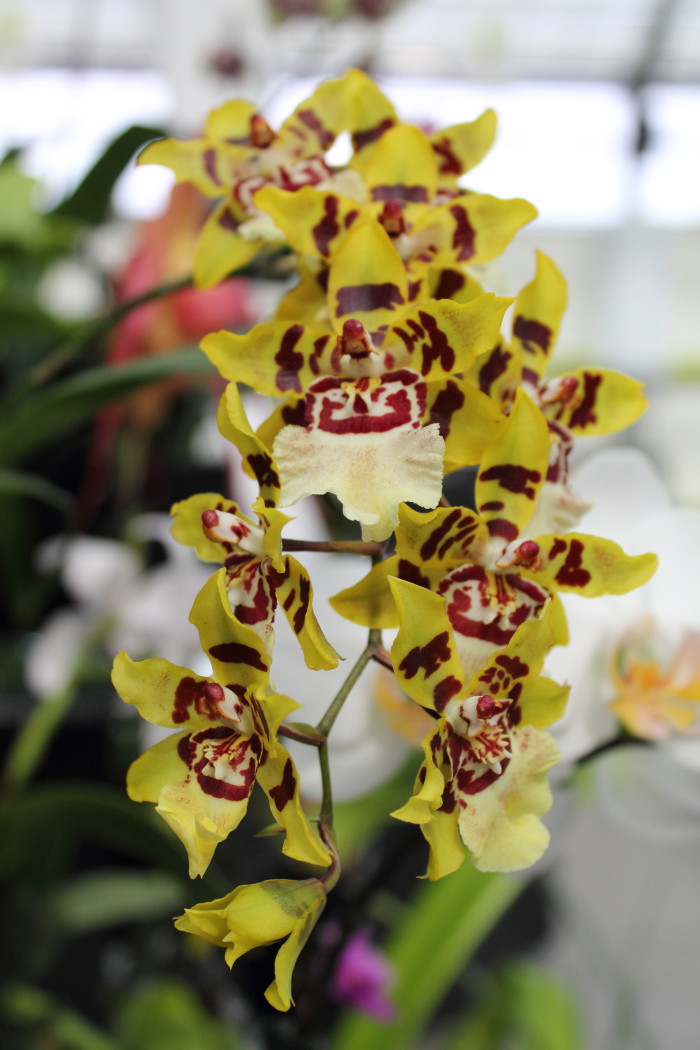
I bought by first DSLR camera in January and I'm slowly learning how to use it. I'd like to do a regular series where I talk about what I'm learning and share some of my photos. If there are any seasoned photographers out there it would be great to know what you think!

The Orchid Show

An annual event put on by a group of orchid enthusiasts, this year the show was held in a beautiful greenhouse outside the city - a big improvement from last year's school gymnasium. Since this was my second time attending I had an idea of what to expect, but was still blown away by the incredible variety of colours and shapes that these plants manage to create. There's so much to look at it can be overwhelming, and hard to decide what to take pictures of. I decided to jump right in, shooting anything that caught my eye - and there was a lot! It took some patience since the place was pretty crowded and everyone had a camera of some kind (most people were using their phones). I gave myself permission to take my time, fiddling with settings and trying different angles, often taking a dozen shots of the same flower. My patience paid off - I was really happy with how a lot of the shots turned out. I've shared some of my favourites, as well as some tips that I learned along the way.

Orchid 2

Playing with Depth of Field

Back in University I took a photography class and, though we used film cameras (I'm not that old, we were already well into the digital age, but the instructors thought we would get a better grasp of the medium if we used film and developed it ourselves), the basic concepts are still the same. Working with a shallow depth of field was always my favourite thing to do. This is when the subject of the photo is sharply in focus and the rest of the picture is blurred away. It's fun to play around with isolating a very specific part of the image, especially when working with something as intricate as an orchid. It really makes them pop out of the busy background of flowers and people. For most of these I used the Aperture Priority setting on my camera, which lets me choose the f-stop and depth of field, while the camera chooses all the other settings. I used the biggest aperture that I could to really zoom in on the delicate details.

Orchid 3

What Deleting Taught Me

While shooting the pictures was a great experience, I definitely learned more when I loaded them up on my computer and went through them all, deleting the ones I didn't like. It was really interesting to see which ones grabbed my attention and which fell flat. Here are a few of the things I noticed:

1) Though I won't pretend that I did it on purpose, I love how some of the flowers are crisply in focus, while others gradually fade away, like the one above. This is something I would like to play with more intentionally.

Orchid 4

2) I definitely could have played more with angles. On the few that I did have multiple angles, it was easier to choose a great picture. Next time I'll try to remember to get below the subject, above it, and look at it from all sides. The best part of digital is that I can take as many pictures as my memory card can hold and I intend to take advantage of that.

Orchid 5

3) I need to pay more attention to overall composition, and especially what's in the background. This kind of thing is really easy for me to see after I've taken the shot, but I don't see as clearly when I'm actually composing it. The only thing I was really thinking about was using the rule of thirds (imagining lines breaking the canvas into thirds horizontally and vertically and lining the subject up with those imaginary lines). This definitely helped, but there was more to consider. Like whether a piece of the flower was cut off, whether there were people in the background or more flowers (even when they're supper blurry, flowers look better than people in the case, and both look better than black display fabric). In the future I would also like to play more with lines, using stems and leaves to guide the eye through the picture.

Orchid 6

4) While I definitely got some shots with good contrasting colours, this will be fun to play with some more. Again this comes down to more carefully composing the shot, and training my eye to see things in the real world that would stand out in a photo.

Orchid 7

A lot of the photos looked overexposed on the screen so I was breaking out the manual mode to try and correct that. Turns out they were just fine and my adjustments meant some of them ended up being too dark. Oh well! Overall I had a really great time and am surprised at how well some of these turned out. I was able to edit some of the ones that didn't turn out so well - but I'll save that for another post about editing once I've had more practice. I can't wait for my next photo shoot!

Orchid 1

I'd love to hear about your experiences with DSLR photography. What are some of your favourite subjects to shoot? What are some common challenges? Share your thoughts in the comments below.

Why Winter is One of my Favourite Seasons

Up here at latitude 53 winters are cold and dark. Some might say brutal. I say beautiful.

snow sculpture

I'm not afraid to say it. I love winter. I can't get enough of the smooth white piles, the empty white fields, the crisp blue skies, and soft pink sunrises. I find that every winter I find more and more ways to get outside and enjoy it. Here are a few things that made me love this winter in particular:

Festivals

Earlier this month, Matt and I were sure to check out a festival we loved last year: The Flying Canoe adventure. Can't get much more Canadian than this. The festival is based on Metis and Aboriginal legends and takes place in and around a ravine after dark. The steep, icey paths are lit by intricately carved lanterns, and you're likely to run into some lost voyageurs paddling their canoes, or a pack of wolves. With storytelling, fires to warm by, bannock to cook, musical performances, dancing, and awe-inspiring lighting installations, it's really not surprising that the festival draws such a large crowd, even in the depth of a -25 (C) February night. The sense of magic in the air was palpable as we crossed the frozen creek towards a giant teepee, lit up against the city skyline, or followed a trail through the woods to look at a series of art installations: from a collection of glowing, hanging ice balls to twisting woven wire that evoked the northern lights.

flying canoe

Camping

More recently I tried winter camping for the first time: something I honestly thought I would never do. I loved clearing a space in the waist deep snow for our fire - it felt like being back in elementary school and building snow forts, only this was real life and what we were building would keep us warm and happy. The quiet in the woods at this time of year is unreal. Even compared to summer camping when there are usually birds, water running, wind in the leaves. Here there was nothing. We built a lean-to, gathered spruce bows to sleep on, gazed up at the full moon, and sang around the fire after the sun went down. While I won't pretend that I was completely comfortable the whole time, I did feel strong and capable, and had a lot of fun, and I loved every minute of our walk back to the truck, with sunlight gleaming off the snowy trees.

Trapper's tent

Sports

I managed to get out snowboarding twice this year, which is a big accomplishment for me. The first time we went to a local hill where the flat prairie drops down as it approaches the river. Every time we rode the chairlift I soaked in the sun warming my face and lighting up the never-ending fields around us. The second time we bused out to the Rockies for a day at Lake Louise. We got a few brief glimpses of the mountains before the snow started to fall and completely obscured any view. While visibility was not so great, the fresh snow felt amazing under my new snowboard. Even falling was more fun as the soft powder just went flying on impact.

I also tried cross-country skiing for the first time. I took a lesson with my family and we really felt like troopers since it was -35! Once I got moving I barely felt the cold. It was just me and snow and the strange swoosh sound the skis make. I loved it.

This winter I learned that the weather doesn't have to impact what activities I do or don't do. If it's 20 below I just put on warmer socks and more layers. If it's windy I make sure my face is covered. Sitting at home feeling sad about the weather does not make for a fun time. Instead I focused on the beauty to be seen, the new skills to be learned, and the adventures to be had. And the rewards? Satisfaction, inspiration, joy, exercise, greater confidence, and so so so much fun.

If you live in a northern latitude what do you do to make the most of the winter months? Leave a comment below.

White beard


My First Sketching Challenge

Last month I challenged myself to draw 30 sketches of Edmonton (my home city) in 30 days, and I invited people to join me in the challenge. The goals were to create new perspectives of the city and to create a consistent creative practice while breaking down creative barriers. It was hard! Though I didn't make it to 30 and there were some days when the last thing I wanted to do was sketch, I learned a lot. I've decided to share some of the photos and a bit of my creative journey throughout the month. You can see all my sketches and those that other people sent in on the project blog at sketchesofyeg.tumblr.com. The first sketches I did felt liberating and exciting. The idea came out of a desire to be creative every day, and to encourage others to be creative, and at first I felt like this project was really going to help. I was bringing my sketchbook everywhere, finding inspiration in unlikely places, and even pushing myself to draw while I was with people.

Playground     

And then something happened. I started to judge my sketches more harshly. I started to feel embarrassed when the sketches I was posting weren’t perfectly accurate and polished and I was frustrated that they didn’t look the way I thought they should. Soon I saw my daily drawing as a chore, rather than a fun way to inject creativity in my day.

What went wrong?

Little blue car sketch     Jukebox sketch

I forgot to let the project be fun. I started to feel like I was in art class again and was worried about getting a bad grade (the reason I didn’t do a major in Art, or a BFA, was that I was worried the schooling would make me hate making things – I think it was the right choice). Even though I had invented the project and I had stated that the goals were not to create perfect replicas of things I saw (that’s what photographs are for), I was feeling responsible to some sort of invisible judge and it was defeating the whole purpose. Once I realized what was happening, I worked on trying to let that judgment go and enjoy the last week of sketching.

Here’s what I learned throughout the month:

1. Take the pressure off. Yes I had made a commitment to sketch every day, but I hadn’t made a commitment to make flawless works of art every day. No one was going to give me a grade. No one expected it to look like a photograph. Looking at the Urban Sketchers website was a huge help as it showed me that even “really good” artists don’t get perspective right every time, don’t draw straight lines, and use squiggly lines to represent trees and people.

Hummer sketch     Balcony sketch

2. Slow down. When I was in a hurry to get a sketch done I was never happy with the result. If I spent time really looking at my subject and carefully figuring out how that would translate to the page, the compositions would work out much better. This made the experience more enjoyable in general since I found myself really looking at things I might have only glanced at in passing.

3. Speed up. Conversely, I tried not to be too fussy. I’ve read that it’s better to sketch quickly, without trying to get every line in exactly the right place. Once I had a general idea of how the image would fit on the page, I tried to work quickly so that my negative inner monologue wouldn’t have time to catch up. I also tried to look more at what I was sketching than at my paper.

School house sketch     Fountains sketch

4. Other people are so impressed by the fact that you’re drawing in public that they won’t think to criticize you. There were times when I felt so self-conscious about having people see what I was sketching. But I’ve never had anyone tell me it wasn’t good and I needed to focus more on that. I finished a sketch while sitting with some friends and one of them said, “I’m amazed that you did that. I was just sitting here talking and you whipped that out. I couldn’t do that.”

When the challenge ended I was relieved that I didn’t need to sketch every day. But now I almost wish I had extended the challenge so that I could work through the struggle and find joy in it again. A friend told me that whenever we do something that’s really important to us, there will be times that we hate it and times that we love it and we just have to keep working through the ups and the downs and doing the work that matters most to us. I still carry a sketchbook around, looking for inspiration and ideas, though I definitely feel less motivated without the daily deadlines!

Are there areas of your creative life that are important to you but somehow still really hard to get done?